顯示具有 CSS 標籤的文章。 顯示所有文章

2010年4月27日 星期二

CSS簡寫指南

CSS简写指南 | CSS | 前端观察

高效的css寫法中的一條就是使用簡寫。通過簡寫可以讓你的CSS文件更小,更易讀。而瞭解CSS屬性簡寫也是前端開發工程師的基本功之一。今天我 們系統地總結一下CSS屬性的縮寫。

色彩縮寫

色 彩的縮寫最簡單,在色彩值用16進制的時候,如果每種顏色的值相同,就可以寫成一個:
1
color#113366
可 以簡寫為
1
color#136
所 有用到16進制色彩值的地方都可以使用簡寫,比如background-color、border-color、text-shadow、box- shadow等。

盒子大小

這裡主要用於兩個屬性:margin和padding,我們以margin為 例,padding與之相同。盒子有上下左右四個方向,每個方向都有個外邊距:
1
2
3
4
margin-top:1px;
margin-right:1px;
margin-botton:1px;
margin-left:1px;
這 四個值可以縮寫到一起:
1
margin:1px 1px 1px 1px;
縮 寫的順序是上->右->下->左。順時針的方向。相對的邊的值相同,則可以省掉:
1
2
3
4
margin:1px;//四個方向的邊距相同,等同於margin:1px 1px 1px 1px;
margin:1px 2px;//上下邊距都為1px,左右邊距均為2px,等同於margin:1px 2px 1px 2px
margin:1px 2px 3px;//右邊距和左邊距相同,等同於margin:1px 2px 3px 2px;
margin:1px 2px 1px 3px;//注意,這裡雖然上下邊距都為1px,但是這裡不能縮寫。

邊 框(border)

border是個比較靈活的屬性,它有border-width、border-style、border- color三個子屬性。
1
2
3
border-width:數字+單位;
border-style: none || hidden || dashed || dotted || double || groove || inset || outset || ridge || solid ;
border-color: 顏色 ;
它 可以按照width、style和color的順序簡寫:
1
border:5px solid #369;
有 的時候,border可以寫的更簡單些,有些值可以省掉,但是請注意哪些是必須的,你也可以測試一下:
1
2
3
4
5
border:groove red;  //大家猜猜這個邊框的寬度是多少?
border:solid;  //這會是什麼樣子?
border:5px;  //這樣可以嗎?
border:5px red; //這樣可以嗎??
border:red; //這樣可以嗎???
通 過上面的代碼可以瞭解到,border默認的寬度是3px,默認的色彩是black——黑色。border的縮寫中border- style是必須的
同時,還可以對每條邊採用縮寫:
1
2
3
4
border-top:4px solid #333;
border-right:3px solid #666;
border-bottom:3px solid #666;
border-left:4px solid #333;
還 可以對每個屬性採用縮寫:
1
2
3
border-width1px 2px 3px; //最多可用四個值,縮寫規則類似盒子大小的縮寫,下同
border-stylesolid dashed dotted groove;
border-color:red blue white black;

outline

outline 類似border,不同的是border會影響盒模型,而outline不會。
1
2
3
outline-width:數字+單位;
outline-style: none || dashed || dotted || double || groove || inset || outset || ridge || solid ;
outline-color: 顏色 ;
可 以縮寫為:
1
outline:1px solid red;
同 樣,outline的簡寫中,outline-style也是必須的,另外兩個值則可選,默認值和border相同。

背景 (background)

background是最常用的簡寫之一,它包含以下屬性:
1
2
3
4
5
background-color: color || #hex || RGB(% || 0-255) || RGBa;
background-image:url();
background-repeat: repeat || repeat-x || repeat-y || no-repeat;
background-position: X Y || (top||bottom||center) (left||right||center);
background-attachment: scroll || fixed;
background 的簡寫可以大大的提高css的效率:
1
background:#fff url(img.png) no-repeat 0 0;
background 的簡寫也有些默認值:
1
background:transparent none repeat scroll top left ;
background 屬性的值不會繼承,你可以只聲明其中的一個,其它的值會被應用默認的。

font

font簡寫也是使用最多的一個,它也是 書寫高效的CSS的方法之一。
font包含以下屬性:
1
2
3
4
5
6
font-style: normal || italic || oblique;
font-variant:normal || small-caps;
font-weight: normal || bold || bolder || || lighter || (100-900);
font-size: (number+unit) || (xx-small - xx-large);
line-height: normal || (number+unit);
font-family:name,"more names";
font 的各個屬性也都有默認值,記住這些默認值相對來說比較重要
1
2
3
4
5
6
font-style: normal;
font-variant:normal;
font-weight: normal;
font-size: inherit;
line-height: normal;
font-family:inherit;
事 實上,font的簡寫是這些簡寫中最需要小心的一個,稍有疏忽就會造成一些意想不到的後果,所以,很多人並不贊成使用font縮寫
不 過這裡正好有個小手冊,相信會讓你更好的理解font的簡寫:
font缩写

列 表樣式

可能大家用的最多的一條關於列表的屬性就是:
1
list-style:none
它 會清除所有默認的列表樣式,比如數字或者圓點。
list-style也有三個屬性:
1
2
3
list-style-type:none || disc || circle || square || decimal || lower-alpha || upper-alpha || lower-roman || upper-roman
list-style-position:  inside || outside || inherit
list-style-image:  (url) || none || inherit
list- style的默認屬性如下:
1
list-style:disc outside none
需 要注意的是,如果list-tyle中定義了圖片,那麼圖片的優先級要比list-style-type高,比如:
list-style:circle inside url(../img.gif)
這 個例子中,如果img.gif存在,則不會顯示前面設置的circle符號。
PS:其實list-style-type有很多種很有用的樣 式,感興趣的同學可以參考一下:https://developer.mozilla.org/en/CSS/list-style-type

border- radius(圓角半徑)

border-radius是css3中新加入的屬性,用來實現圓角邊框。這個屬性目前不好的一點兒是,各個瀏 覽器對它的支持不同,IE尚不支持,Gecko(firefox)和webkit(safari/chrome)等需分別使用私有前綴-moz-和 -webkit-。更讓人糾結的是,如果單個角的border-radius屬性的寫法在這兩個瀏覽器的差異更大,你要書寫大量的私有屬性:
1
2
3
4
5
6
7
8
9
-moz-border-radius-bottomleft:6px;
-moz-border-radius-topleft:6px;
-moz-border-radius-topright:6px;
-webkit-border-bottom-left-radius:6px;
-webkit-border-top-left-radius:6px;
-webkit-border-top-right-radius:6px;
border-bottom-left-radius:6px;
border-top-left-radius:6px;
border-top-right-radius:6px;
呃, 是不是你已經看的眼花了?這只是要實現左上角不是圓角,其它三個角都是圓角的情況。所以對於border-radius,神飛強烈建議使用縮寫:
1
2
3
-moz-border-radius:0 6px 6px;
-webkit-border-radius:0 6px 6px;
border-radius:0 6px 6px;
這 樣就簡單了很多。PS:不幸的是,最新的Safari(4.0.5)還不支持這種縮寫… (thanks @fireyy)

2010年1月13日 星期三

如何設計有效的佈局?

該[指南]版權以及最終解釋權為作者阿里巴巴(中文站)用戶體驗設計部 李龍(李小帥所有,轉載請註明出處。

標準和規範:
1.柵格化:
  • 我們所說的柵格化是指在網頁設計工作中對柵格系統的建立和應用。網頁柵格系統來源於平面柵格系統,它以規則的網格陣列來指導和規範網頁中的版面佈局以及信息分佈。
  • 柵格化可以使信息呈現工整簡潔、美觀易讀,降低頁面開發和運維成本。它結構變化相對靈活,擴展性強。

2.以8px為橫向柵格單位:
  • 以8px為橫向柵格單位,頁面所有元素寬度都可以是2的倍數,包括圖片和版塊寬度,這樣可以在一定程度上加快頁面(特別是對於J-PEG圖片)的渲染速度(基於計算機內部二進制的運算機制)。其在擴展和兼容性上也有一定優勢。
  • 在阿里巴巴中文站中,佈局間距的最小單位為8px,佈局區塊採用32px(8px*4)和24(8px*3)兩種粒度單位,分別組成以下兩種可實現的柵格系統:
        32px:適用於市場、社區等相關頁面
       
        24px:適用於旺鋪相關頁面
       

3.頁面定寬:
  • 自適應可以根據瀏覽器顯示情況自動調整頁面寬度,但是因為用戶水平方向的聚焦範圍有限,所以當頁面過寬時,用戶的瀏覽和操作成本會增加;而當頁面 過窄時(如用戶同時開啟兩個瀏覽器對比查看商品搜索結果),自適應則會導致佈局變形和內容錯亂。給頁面規定寬度可以避免這些問題。
  • 在綜合考慮當下主流分辨率情況、瀏覽器外觀對顯示空間的佔用、人機工程學中對水平視角和聚焦範圍的規定以及8px單位等多種因素後,我們認為 960px是一個相對更加合理的頁面寬度。在阿里巴巴中文網站中,推薦使用定寬960px的頁面,去除左右各4px的邊距,中間的可視寬度為952px。

2009年8月15日 星期六

CSS Position Fixed for IE6

CSS Position Fixed for IE6
修正IE6不支持position:fixed的bug

/* 除了IE6的主流瀏覽器通用的方法 */
.fixed-top /* 頭部固定 */{position:fixed;bottom:auto;top:0px;}
.fixed-bottom /* 底部固定 */{position:fixed;bottom:0px;top:auto;}
.fixed-left /* 左側固定 */{position:fixed;right:auto;left:0px;}
.fixed-right /* 右側固定 */{position:fixed;right:0px;left:auto;}


/*讓position:fixed在IE6下可用! */
* html,* html body /* 修正IE6振動bug */{background-image:url(about:blank);background-attachment:fixed;}
* html .fixed-top /* IE6 頭部固定 */{position:absolute;bottom:auto;top:expression(eval(document.documentElement.scrollTop));}
* html .fixed-right /* IE6 右側固定 */ {position:absolute;right:auto;left:expression(eval(document.documentElement.scrollLeft+document.documentElement.clientWidth-this.offsetWidth)-(parseInt(this.currentStyle.marginLeft,10)||0)-(parseInt(this.currentStyle.marginRight,10)||0));}
* html .fixed-bottom /* IE6 底部固定 */{position:absolute;bottom:auto;top:expression(eval(document.documentElement.scrollTop+document.documentElement.clientHeight-this.offsetHeight-(parseInt(this.currentStyle.marginTop,10)||0)-(parseInt(this.currentStyle.marginBottom,10)||0)));}
* html .fixed-left /* IE6 左側固定 */{position:absolute;right:auto;left:expression(eval(document.documentElement.scrollLeft));}


或是簡單的
Fixed Positioning in Internet Explorer 6

1. * {
2. margin: 0;
3. }
4. html, body {
5. height: 100%;
6. overflow: auto;
7. }
8. .wrapper {/*正常的*/
9. position: relative;
10. width: 100%;
11. height: 100%;
12. overflow: auto;
13. }
14. .box {/*固定的*/
15. position: fixed;
16. left: 10px;
17. top: 180px;
18. }
19. * html .box {
20. position: absolute;
21. }

2009年6月30日 星期二

DIV垂直居中對齊

在DIV中,無法控制元素的垂直對齊方式。

垂直居中必須透過line-height:div的高度

2009年6月26日 星期五

防止長字串破壞畫面布局

CSS:
overflow:hidden; //給FF3.5之前的版本,超過的部份會隱藏
word-wrap:break-word; //FF3.5和IE6之後的版本都支援強制換行

可用於div或table之類

css 更有效率的寫法

這邊介紹了許多css內定的縮寫語法
可將許多屬性寫在一起,不必分別指定

Efficient CSS with shorthand properties

2009年6月24日 星期三

版面(元素)置中,居中布局

SimpleBits ~ CSS Centering 101

body {
text-align: center;
}

#container {
margin: 0 auto;
width: xxxpx;
}


<body>

  <div id="container">

    ...entire layout goes here...

  </div>

</body>

2009年6月11日 星期四

如何幫 span 設定寬度又不會被強制換行

設置span的寬度,讓span象button那樣顯示 - Sandy's Blog

span {
display:-moz-inline-block;/*For Firefox*/
display:-moz-inline-box; /*For Firefox*/
display:inline-block; /*For IE*/
width:150px;
}

2009年6月9日 星期二

[CSS] IE6 模擬 position:fixed 純 CSS 解法

Fixing position:fixed for Windows Internet Explorer
網站製作學習誌 » [CSS] IE6 模擬 position:fixed 純 CSS 解法

直接來看範例


fixed.html


<!DOCTYPE html PUBLIC "-//W3C//DTD XHTML 1.0 Transitional//EN" "http://www.w3.org/TR/xhtml1/DTD/xhtml1-transitional.dtd">
<html xmlns="http://www.w3.org/1999/xhtml">
<head>
<meta http-equiv="Content-Type" content="text/html; charset=utf-8" />
<title>Position:fixed on pure css</title>
<link href="fixed.css" rel="stylesheet" type="text/css" />

</head>
 
<body>
<div id="wrapper">
<p>TEST LINE </p>
<p>TEST LINE</p>

<p>TEST LINE</p>
<p>TEST LINE</p>
...
<p>TEST LINE</p>
<p>TEST LINE</p>

<p>TEST LINE</p>
</div>
<div id="fixed">
<ul>
<li>ITEM 1</li>

<li>ITEM 2</li>
<li>ITEM 3</li>
<li>ITEM 4</li>
<li>ITEM 5</li>

</ul>
</div>
</body>
</html>


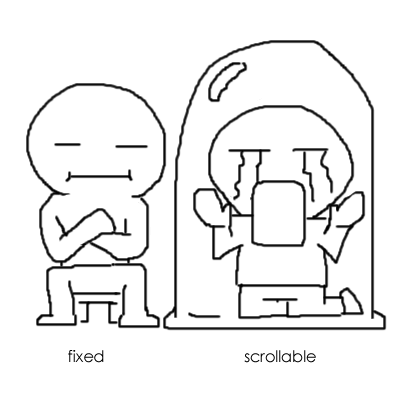
首先我們先把要捲動的部份用 div#wrapper 包起來,要固定的部份 (div#fixed) 則排除在 div#wrapper 之外;然後先對有支援 position:fixed 的瀏覽器做處理,也就是直接利用 position:fixed 來將 div#fixed 定位。


fixed and scrollable


再來是 CSS 的部份:


html, body{
margin:0;
padding:0;
}

 
#fixed {
position:fixed;
width:380px;
top:0px;

right:100px;
}


接下來我們再針對 IE6 做處理,也就是用 * html 這個 hack :


* html {
overflow: hidden;

}
 
* html body,
* html #wrapper {
height:100%;

overflow:auto;
}
 
* html #fixed {
position:absolute;

}


這裡的原理很簡單,就是將 div#wrapper 的高度設為與 body 同高, overflow 設為 auto 即可。


註:上面那篇參考文章裡只提到 body 要設為高度 100% 和 overflow 為 auto ,但我實驗的結果是連 div#wrapper 也要設成一樣,才會正常動作。


最後把固定的部份用 position:absolute 定住,這樣就完成讓 IE6 模擬 position:fixed 的效果啦~